The following example demonstrates how to delete resellers, Power Users, and their associations. A PHP file called Delete_Reseller_Power_User_And_Their_Associations.php can be found in <installdir>/apisamples. Read more in Accessing Example API Functions.
The PHP script finds and deletes objects in the system and prints the following result messages on the screen:
- "Successfully retrieved all the users" / "No user found with the specified ID" / "Failed to get the specified user"
- "Successfully retrieved all the agents" / "No Agents are owned by the specified user" / "Failed to get the specified agent"
- "Successfully retrieved all the volumes" / "No Volumes are exclusively assigned to the specified user" / "Failed to get all volumes"
- "Successfully retrieved all the diskSafes" / "No Disksafes are associated with the agents owned by the user" / "Failed to get all Disk Safes"
- "Successfully retrieved all the policies" / "No Policies are associated with the disksafe assigned to the agents owned by the user" / "Failed to get all the policies"
- "Failed to delete user" / "User deleted successfully"
- "Failed to delete all policie(s)" / "All policie(s) deleted successfully"
- "Failed to delete all Disk Safe(s)" / "All Disk Safe(s) deleted successfully"
- "Failed to delete all Agent(s)" / "All Agent(s) deleted successfully"
- "Failed to delete all Volume(s)" / "All Volume(s) deleted successfully"
Sequence of Automated Actions
The following steps can be accomplished by using this script:
- Get a user with the specified ID. If the ID does not exist, then exit or store the user ID.
- Get Agent IDs which have the specified user ID as their owner. Store all of these Agent IDs.
- Get Disk Safes which have the specified Agent ID. Store the Disk Safe IDs.
- Get policies which contain Disk Safe IDs in the Disk Safe IDs list. Then store the Policy IDs.
- Delete all Policies using the Policy IDs stored in the above step.
- Delete all Disk Safes using the Disk Safe IDs stored in the above step.
- Delete the Agent using the stored Agent ID.
- Delete the Volume using the stored Volume ID.
- Delete the User using the stored User ID.
How to Fulfill Appropriate Actions in the CDP User Interface
Below, you can find the steps to take in the program user interface in order to perform the same actions as the script. We also provide you with screen-shots illustrating the scripts for every step.
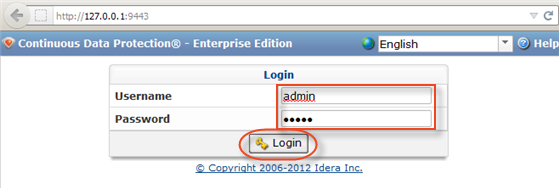
Defining Server Configuration Parameters

Retrieving a User
1.1 Get the User with the specified ID.
To find a User by username, follow the instructions below.
| Note While the script searches by User ID, we search by username in the CDP interface. |


1.2 Click "Filter."

1.3 The found Users are displayed in the list.

Retrieving Agents
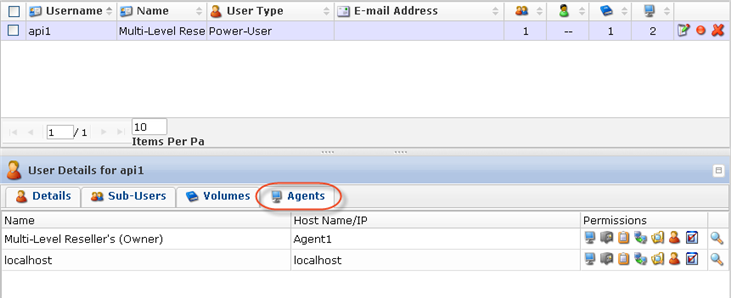
Get all Agents which have the specified user ID as their owner.
Select the "Agents" tab to list all associated Agents.

Retrieve Disk Safes
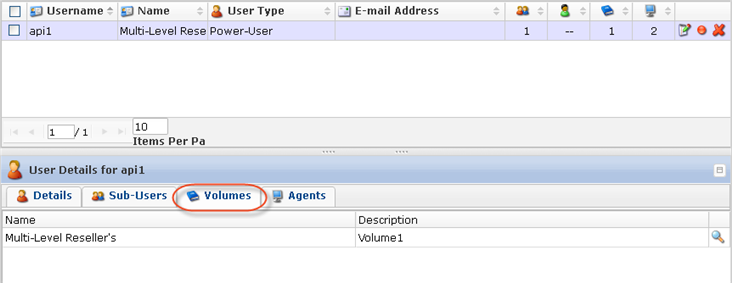
1. Select the "Volumes" tab to list all assigned Volumes.

2. Click on the "Detail" icon in front of the Volume to drill down to the Disk Safes.

3. In the displayed window, select the "Disk Safes" tab to list the Disk Safes assigned to the selected Volume.

Retrieving Policies
Get all policies which contain Disk Safe IDs in the Disk Safe IDs list. Then store all of the Policy IDs.
Deleting the User and its Associations
1. Click on the "Delete" (red X) icon under "Actions" for the corresponding User in the list.

Alternatively, select the check-box(es) in front of the Users and click on the "Delete Selected" button.
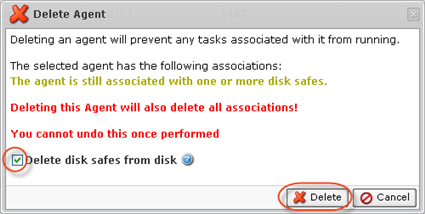
2. Familiarize yourself with the information displayed on the pop-up. Click "Delete."

3. Click "OK" in the success pop-up.

Deleting the Agent, Disk Safes, and Policies
1. Click on the "Delete" (red X) icon under "Actions" for the corresponding Agent in the list.

Alternatively, select the check-box(es) in front of the Agents and click on the "Delete Selected" button.

2. Familiarize yourself with the information displayed on the pop-up. Check the "Delete disk safes from disk" option. Click "Delete."

3. The Agent and its associated Disk Safes and Policies will disappear from the system.
Deleting Volume
1. Click on the "Delete" (red X) icon under "Actions" for the corresponding Volume in the list.

2. Confirm your request to delete the Volume.

In a few moments, the volume record disappears from the "Volumes" list.
