1. Install the Server Using APT-GET
1.1 Configure APT Repository
The Advanced Packaging Tool, or APT, is used to handle the retrieval, configuration, and installation of software packages and the removal of software on Debian GNU/Linux distributions. Configure an APT repository to manage installations of and upgrades to CDP Enterprise Edition.
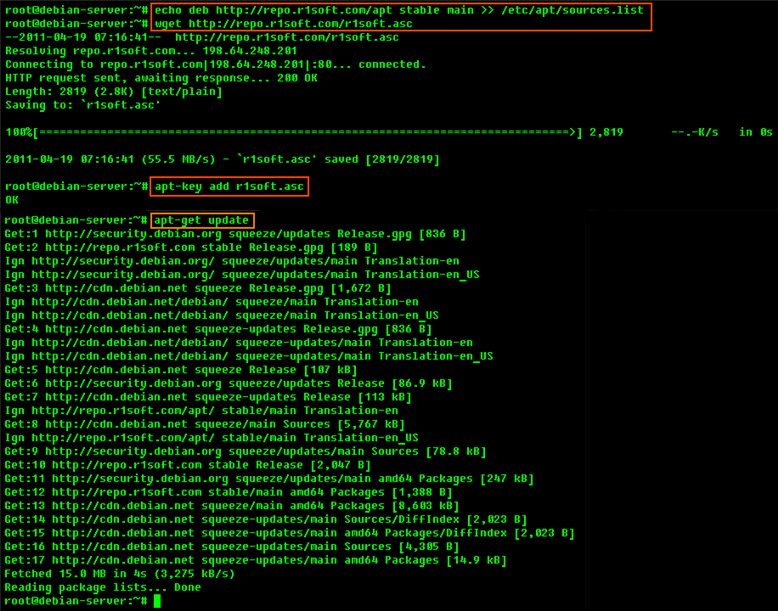
First, modify your /etc/apt/sources.list to include the R1Soft repository, and then download the R1Soft apt gpg key.
When the repository is configured, run apt-get update to download the information about the packages in the new repository:

1.2 Install the Package
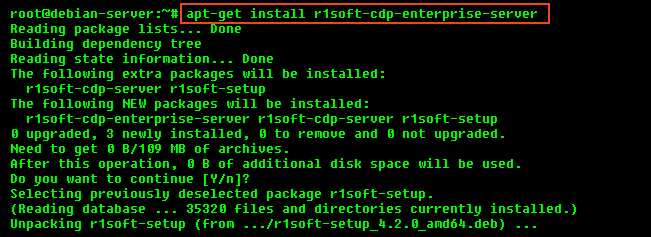
1. Once the APT repository is configured, you can use the following command to install the CDP Server:

2. Once the installation is complete, you can use the help command to list all available options:

2. Install the Server Manually (Using DPKG)
2.1 Download CDP Enterprise Edition
See Obtaining Linux CDP Enterprise Edition.
2.2 Make Sure You Can Unzip the Download
Most Linux distributions come with the unzip utility pre-installed. To determine if you have the unzip utility, run:
This should return an output similar to the following:

If it returns the following, you need to install the unzip utility first:
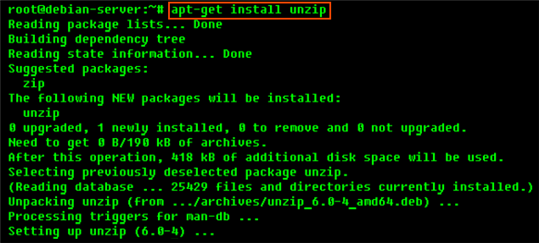
To install unzip on Debian or Ubuntu:

2.3 Extract the ZIP File
We recommend creating a temporary directory to which you can extract the contents of the ZIP file.
1. Use the mkdir command to create a temporary directory (in our case, cdp).
2. Use the mv command to move the archive to that directory. Note that Linux file names are case-sensitive. Make sure you type the name correctly (in our case, "r1soft-enterpriseedition-linux64-4.2.0.zip").
3. Use the cd command to go to that directory.
4. Use the unzip command to extract the files.
2.4 Install the Packages Using dpkg
| Notice You must be a Linux root user to install CDP Enterprise Edition. |
The archive you have extracted contains two folders: one with .deb packages (in our case, "deb-linux32") and one with .rpm packages ("rpm-linux32"). If you are installing on Debian or Ubuntu, choose the .deb package.
Each folder contains a set of CDP components:
- r1soft-cdp-enterprise-edition
- r1soft-setup
- r1soft-cdp-agent
- r1soft-cdp-async-agent-2-6
- r1soft-cdp-server
You will need to install all of them in one step. Use the cd command to go to the folder with the packages (in our case, "deb-linux32") and run the following command:
DEB 32-bit (x86) / DEB 64-bit (x86_64)

| Note The installed files are located in the /usr/sbin/r1soft directory. The server startup script is /etc/init.d/cdp-server. |
| Note You do not need to install the kernel module on the Server. |
3. Configure and Start the CDP Server Web-based User Interface
1. You must define a username and password for the CDP Server Web Interface before you can begin using CDP Enterprise Edition.
Example of how to set "admin" username and "r1soft" password:

After running this command, you will see an output similar to the following:

2. Configure ports, if necessary.
By default, the embedded web server in CDP Enterprise Edition required for the Web-based Interface will listen on TCP ports 80 (HTTP) and 443 (HTTPS). These ports are frequently used by your Linux server (e.g., by Apache). If you are already using ports 80 and 443, you will need to define different ports. Ports 8080 (HTTP) and 8443 (HTTPS) are recommended alternatives to standard 80 and 443. However, you can choose any other valid and unused TCP port.

3. Start the Web Interface (CDP Server):

| Note You may need to change the firewall rules, depending on where you are connecting to the Web Interface from. |
You should now be able to connect to the CDP Enterprise Edition Web Interface using Firefox or Internet Explorer.
