Getting Support
Getting support is easy at R1Soft. We are here to ensure you get the most out of your Server Backup software.
Quick Links:
Downloading Data for Technical Support
Portal Registration
R1Soft Server Backup Customer Support Portal
Documentation
Release Notes
Live Chat
License Management
R1Soft Server Backup Support includes:
- Technical Support is available 24 hours a day, 7 days per week. Response times are based on severity of the case.
- Live Chat Tech Support from 8AM - 6PM CST/CDT (GMT-6) Monday - Friday. To start a chat with R1Soft Support, log into the Support Portal and click the chat link on the Support Portal Home Page.
- Access to the latest product release downloads.
If you have a System Down or Restore Emergency please make sure to set the case priority accordingly so it is treated with the correct priority by our teams.
- Restore Emergency = A critical restore is unsuccessful, but the hardware/software is properly configured and the user has previously had success with the same type of restore in the past.
1. Set 'Type' to Restore Emergency
2. Set 'Priority' to Critical
3. Set 'Severity' to Critical - System Down Emergency = The product will not run, none of its features can be utilized
1. Set 'Type' to Tech Support
2. Set 'Priority' to System Down Emergency
3. Set 'Severity' to Critical
NOTE: Technical Support may make adjustments to Type, Priority and Severity based on the type of issue described in the support case or its current status.
Creating a Support Portal Login
If you do not already have a login for the technical support portal, you may complete the registration form here. A login account and password will be emailed once your current support maintenance plan has been confirmed. To get a status on your support plan, please email sales@r1soft.com.
Log In
Browse to http://support.r1soft.com/ and use the Log In ID and Password that you received via email.

If you have forgotten your password, simply click on the "Forgot your password?" link in the Login dialog, enter your login ID (typically your email address) and a new password will be emailed to you within a few moments.
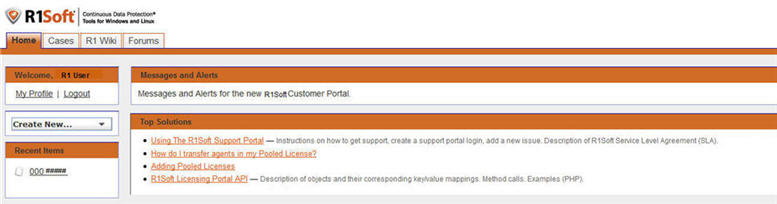
Home Tab
Once you successfully log in to the portal, your browser will take you directly to your "Home" tab where you may:
- Change your profile information
- Log out of the portal
- View messages or alerts from R1Soft Server Backup Technical Support Staff
- Create a new case
- View your recent cases
| Note You may select from any of the available tabs at the top of the page to jump to a specific task: Cases, Product Wiki, Forums. |
Cases Tab

You may view cases by using one of the three "View(s)" available.
- R1Soft Active view - Allows you to view the cases that are currently categorized as open.
- Closed cases view - Allows you to view closed cases.
- Recently Viewed Cases - Allows you to view cases categorized as recently viewed.
Once you have selected the desired view from the drop down menu, click the "Go!" button. The Portal will display the cases according to the view chosen. To view one of the cases, simply click the "Case Number" or "Subject" link.
| Tip Cases shown in the "Closed" view may be reopened by clicking the case link and adding a new comment to the case. |
You may also create a new case from the "Cases" tab by clicking the "Create New Case" button.
Opening a new Case & Case Edit

After you have clicked the "Create New Case" button, the portal will display the screen shown above. Some fields are automatically populated for you. Required fields have a vertical red bar next to them. You must make a selection from the drop down menus in these fields. Required fields that do not have a drop down menu are free form text entry.
| Tip You do not need to adjust the (Automatic) options below. |
1. Type (Required)
- Tech Support - Choose this option if you have purchased CDP and need to report a technical issue.
- Trial and Deployment - Choose this option if you have not purchased CDP and need to report a technical issue.
- Restore Emergency - Choose this option if you have need to report a failed restore that requires immediate attention.
- Licensing and Billing - Choose this option if you need to request assistance with a license or billing issue.
2. Status (Automatic)
- Open - The default value that is assigned when a case is first opened and is automatically selected by the portal.
- R1 Soft Investigating - Indicates that the Technical Support Engineer or Development has the next action item. The case will automatically change to this status after you add a comment to the case.
- Escalated - Indicates that the case is currently being reviewed by Development. NOTE When you add a comment to your case, the portal will automatically change the status from 'Escalated' to 'R1 Soft Investigating' in order to alert the support engineer that a comment was added. Development may not be able to review the case while it is in an investigating status.
- Reopened - Indicates that the case was closed, but is currently open and active.
- Waiting for Customer - Indicates that the customer has the next action item.
- 5-day Follow up - Indicates that the case has been in the "Waiting for Customer" stage for longer than 3 days and will be closed within 5 days from the time the Status changed.
- Awaiting Product Fix - Indicates that R1Soft Server Backup Support will notify the customer once a fixed version is released (this may also indicate that a feature request has been submitted to Development).
3. Priority (Required)
- 1 - System Down Emergency - Choose this option if the product is entirely non-functional and immediate assistance is required.
- 2 - Critical - Choose this option if a major feature is non-functional and impacts many users.
- 3 - High - Choose this option if a feature is non-functional.
- 4 - Medium (default) - Choose this option for full or intermittent failures impacting a moderate number of users.
- 5 - Feature Request - Choose this option to submit a feature request.
- 6 - Escalated - The Technical Support Engineer will choose this option when escalating the case to Development.
4. Case Origin (Automatic) - Defaults to Web and is only used for statistical purposes.
5. Case Owner (Automatic) - Indicates the Technical Support Engineer assigned to the case. While opening the case, the system will default the value to your user name. Once the case is submitted, the system will automatically assign the case to the technical support group with further assignments being made to a Technical Support Engineer.
6. Product & Version (Required)
- Choose the product and major version for the issue you are reporting.
- Choose the minor version for the issue you are reporting.
7. Component (Required)
Choose from Server, Agent or Both to indicate which component is affected by the issue you are reporting.
8. Build (Optional)
Enter the build of the product being used. Found in the product version as x.x.[build].
9. OS and Version & Kernel Version (Optional)
Enter the Operating System, Version and Service Pack applied if applicable.
10. Subject (Required)
Enter the product error associated with the issue being reported or a brief description.
11. Environment (Optional)
Enter any helpful information about the environment or configuration pertaining to the product.
This section may also be used to securely store system access credentials for Support.
12. Description (Required)
- Enter a description of the issue you are reporting. This should include a description of the behavior of the product, when the issue occurs and how long the behavior has been experienced.
13. Submit, Submit & Add Attachment, Cancel
- Choose one of these buttons to submit the case to R1Soft Server Backup Technical Support, add an attachment after submitting or cancel the request without saving the information already entered.
| Note Case attachments are limited to 5 MB per file and 10 MB total, per case. For larger attachments, please click on the "Attachments" tab and complete the form to upload your attachments. It is very important to enter your case number into the form so that there is no delay in processing your attachments. |
Case Comments

As shown above, the "Case Comments" section displays correspondence between you and the Technical Support Engineer. You may add new comments by clicking the "Add Comment" button. You do not need to click the "Edit" button at the top of the page in order to add comments. You may also add new attachments by clicking the "Attach file" button or by using the "Attachments" tab at the top of the page. The following shows how to edit/add a comment after clicking the "Add Comment" button.
| Note The Customer Support Portal will send you an automated email to notify you when comments or other changes have been made to your case by the R1Soft Server Backup Technical Support Team. If you are relying on emails for case update notification, please, add support-inbound@r1soft.com to your email spam filter's "allowed" list. |
Case Comment Edit
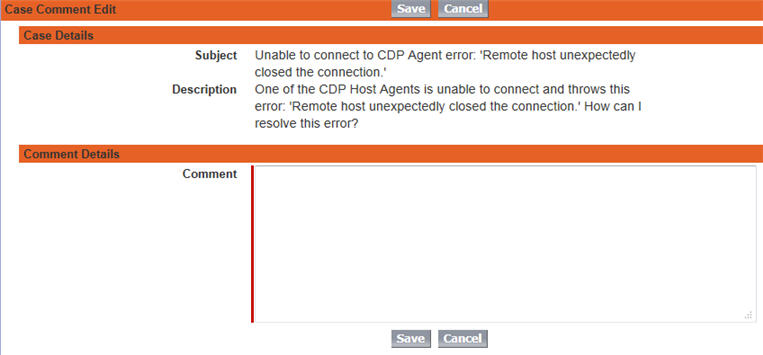
As shown above, you may enter free text comments after you have clicked the "Add Comment" button. Once you have entered your comment, click "Save." Click "Cancel" to discard your comments from this screen.
Close Case

Once you determine that the issue has been resolved, you may close the case by clicking the "Close Case" button in the "Case Detail" screen. After clicking the "Close Case" button, you will see the screen shown above.
- Status (Required)
- Resolved - Choose this status when the issue has been resolved using a solution or assistance provided by R1Soft Server Backup Technical Support.
- Closed - Choose this status when you no longer wish to troubleshoot the error.

Note
You may re-open a case at any time. For more information, refer to the "Cases Tab" heading located in the beginning of this document.
| Note All notification emails generated by the Customer Support Portal will be sent from the email address support-inbound@r1soft.com. Replies to notification emails are not monitored when sent to support-inbound@r1soft.com. To reply, please, login at http://support.r1soft.com and update your case with a new comment. |
R1Soft Server Backup Technical Support will continue to make refinements to the Customer Support Portal. Any new features or changes will be added to this document to keep you informed.