The Backup Manager installer is a typical Windows installer application. Once you have obtained the Server Backup Manager installation file and Windows Backup Agent, follow the instructions given below to install Server Backup Manager. You can find the instructions on how to install Backup Agent in Install Backup Agent on Windows and Install Backup Agent on Linux.
1. Log on to the Windows server as a member of the local Administrators group.
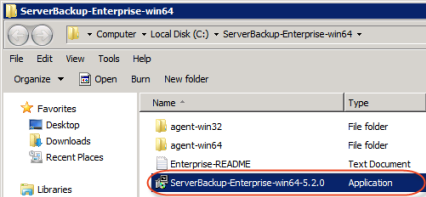
2. Navigate to the directory where you saved the Backup Manager installation file.
3. Extract this archive to any folder.
| Note After the Backup Manager is installed, you must install the Backup Agent on a computer you want to backup. The "Agent" installer package contains only the Agent software and is a much smaller package. |
4. Double-click the file from the folder in which the archive has been unpacked.
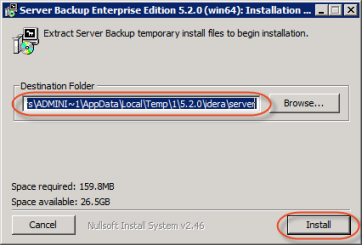
5. In the Welcome window, select a destination folder or leave it as is. Click "Install" to extract temporary install files.
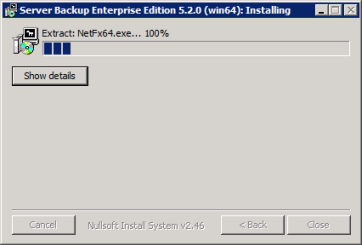
6. Wait while the files are extracted.
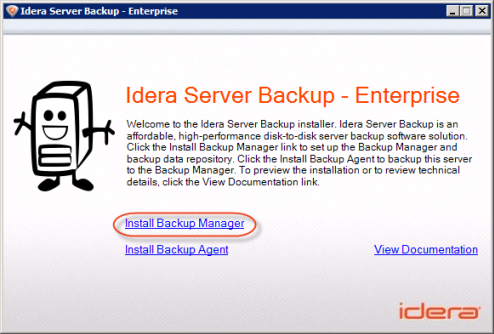
7. Click "Install Backup Manager" in the opened window.
8. If Microsoft .NET Framework 2.0 is not already installed on your PC, you will be asked to install it. Click "Yes."

If Microsoft .NET Framework 2.0 is installed, go to Step 13.
9. Click "Next" to start Microsoft .NET Framework 2.0 setup.

10. The next screen will display the "End-User License Agreement." Read it to the end, select the "I accept ..." check-box, and then click "Install."

11. You will see a progress bar notifying you that the Setup is configuring the installation.

Wait while the components are installed.

The system will inform you once the Setup is complete. Click "Finish" to close the ".NET Setup" window.

12. Once Microsoft .NET Framework is installed, you will be returned to Step 6, where you must again click "Install Backup Manager."
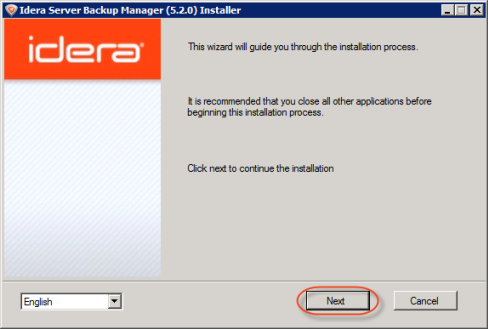
13. The Server Backup Manager Installer will open. Click "Next".
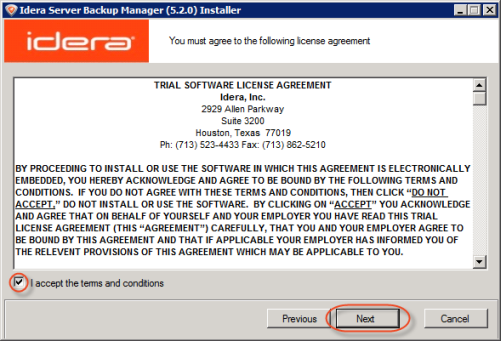
14. You must agree to the following license agreement by clicking the "I accept the terms and conditions" check-box. Read it to the end and click "Next" to proceed.
15. The installer will check your system for possible problems. It is strongly recommended that all tests have a "Pass" status. You can repeat the tests by clicking the "Test" button. Click "Next" to go to the next screen.
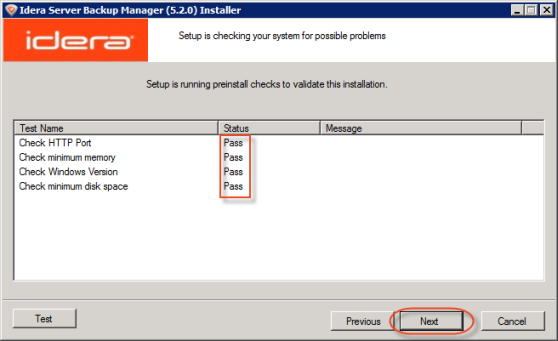
| Note You can find the full list of requirements in Server Backup Manager System Requirements. |
| Note If one or several requirements are not met, then an explanation will be displayed in the "Message" column. For such configurations, further installation is not recommended.  Possible values for the "Status" column are "Pass," "Not Recommended," and "Fail." If possible, correct the configuration and click "Test" again. |
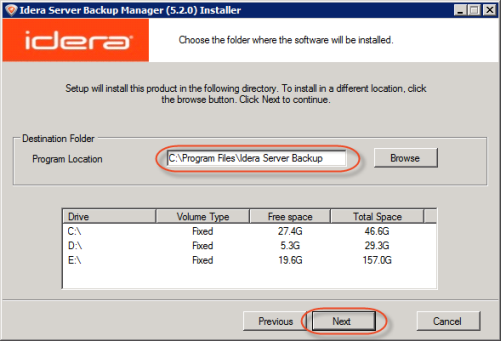
16. On the next screen, choose the installation directory for the Backup Manager. It is safe to leave the default location untouched. However, you can install the software to another directory if, for example, you do not have enough free space on disk C.
Click "Next" to continue.
17. The "User Setup" window will appear. You will be prompted to select the user you want to run the Backup Manager as. By default, the "system account" is selected. It is safe to leave the default value untouched. The only exception is when you want to run the software on behalf of a Domain User that has local administrative rights. Make your selection and click "Next."
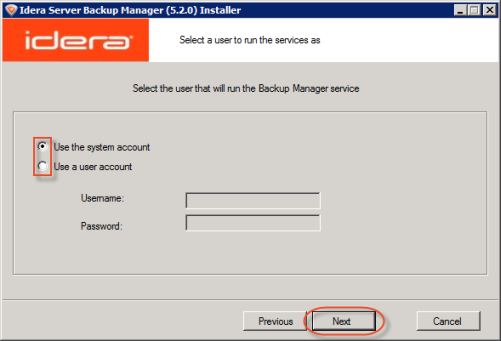
| Note The user account can be changed using the Backup Manager Configuration Utility. |
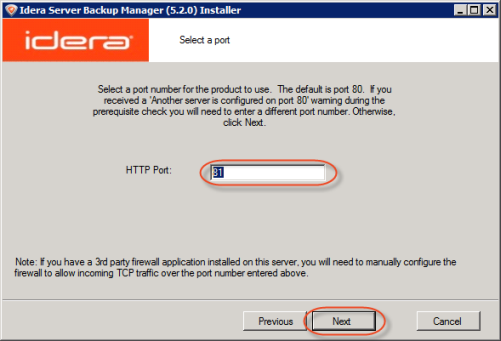
18. Verify HTTP port for Backup Manager interface to run on. Edit this value if necessary. Click "Next."
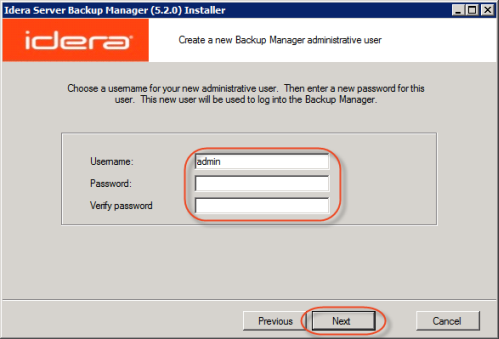
19. Set the Administrative User login credentials. The user name "admin" and the admin password that you select will be used to access the Backup Manager via the Web Interface. The password characters will be replaced by asterisks (*) on the screen. Click "Next."
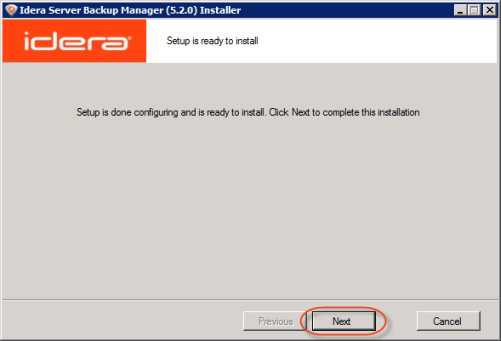
20. The configuration is complete. Click "Next" to start the installation process.
21. The installation process will start.

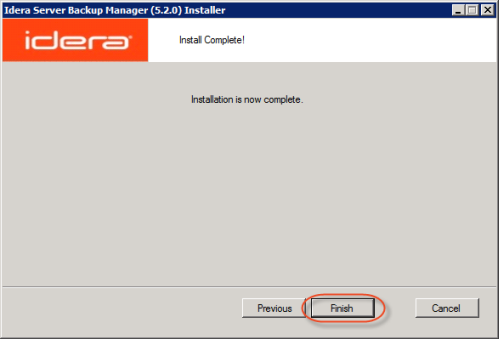
22. Your installation is now complete. Click "Finish."
Proceed to the next steps: