You can work with Disk Safes using the "Disk Safes" window.
Follow the instructions below to access Disk Safes via CDP Interface.
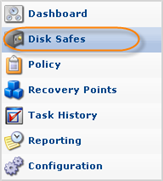
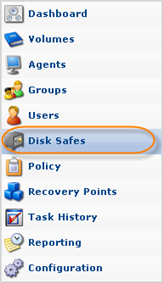
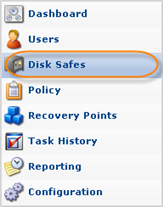
Click on "Disk Safes" in the Main Menu to open the "Disk Safes" window.
| Standard Edition | Enterprise Edition | Advanced Edition |
|---|---|---|
 |
 |
 |
| Tip You can open the "Disk Safes" window by manually appending the /DiskSafe/ folder to the CDP Server address in the browser address bar. Example: http://10.61.200.31/DiskSafe/. Note that the address is case sensitive.  |
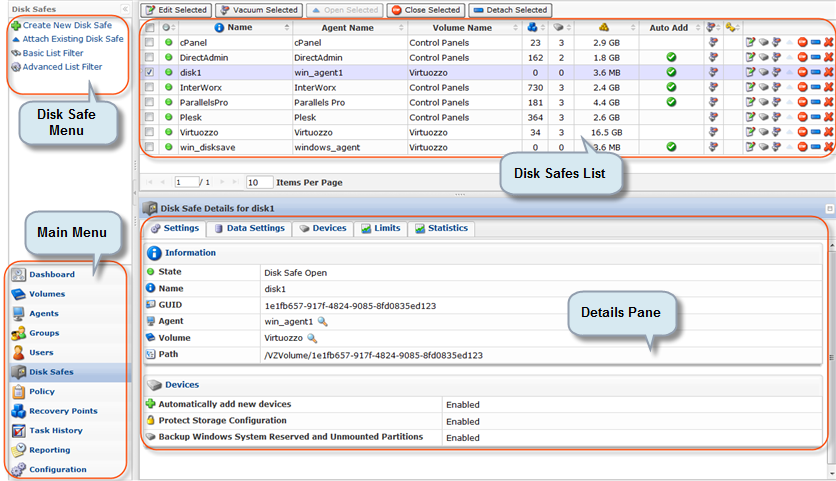
The "Disk Safes" window is divided into the following areas:
- Disk Safe Menu - Provides access to the actions which relate to managing Disk Safes and customizing the "Disk Safes" list.
- Disk Safes List - The Disk Safes added to the system are displayed in this area.
- Details Pane - After you select an item in the list, its details are displayed in this area.
Disk Safe Menu
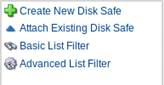
The following "Disk Safe" menu buttons are available:
- Create New Disk Safe - Allows you to add a new Disk Safe to the system. After clicking on this button, you will be able to define the new Disk Safe properties including the associated Devices. See Creating Disk Safes .
- Attach Existing Disk Safe - Allows you to attach a Disk Safe that exists in the system. This option can be used if you copy or move a Disk Safe folder from another server. See Attaching Disk Safes.
- Basic List Filter - Allows you to customize the view of the "Disk Safes" list. You will be able to apply the minimum range (most commonly used) of filter criteria. See Customizing the Disk Safes List.
- Advanced List Filter - Allows you to customize the view of the "Disk Safes" list. You will be able to apply all possible filter criteria. See Customizing the Disk Safes List.
- Show All - Cancels filter settings and shows all records in the "Disk Safes" list. This button is hidden until a filter is applied to the list. See Customizing the Disk Safes List.
"Disk Safes" List
The "Disk Safes" list provides information about Disk Safes in grid format.
| Tip You are able to organize information, such as filtering out the items you do not need to see. You can also sort items, limit the number of items displayed per page, and specify which columns you want to display. See Customizing the Disk Safes List. |
| Tip To find out the column heading, hover the mouse pointer over the column heading, without clicking on it. A yellow tooltip with the title will be displayed.  |
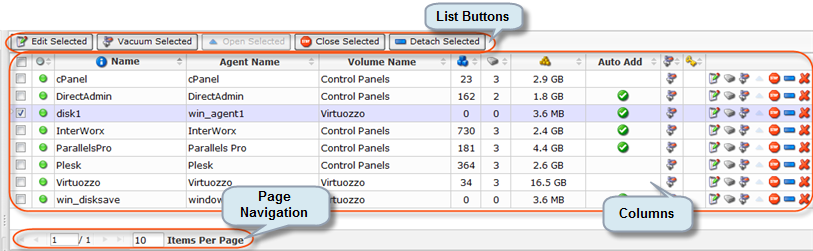
Columns
- State - Graphically indicates the Disk Safe state. If the icon is green, then the Disk Safe is opened. The red icon is used for closed Disk Safes.
- Name - Shows Disk Safe names. The name is defined during Disk Safe creation and can be edited later. It is used to identify the Disk Safe in the list.
- Agent Name (Enterprise Edition) - Shows the name of the Agent.
- Agent Host Name/IP (Enterprise Edition) - Shows the IP address of the Agent.
- Path - If the Disk Safe is not assigned to the Volume, this column displays the Path where the Disk Safe is physically located. For example, C:\Disk_Safe.
- Volume Name (Enterprise Edition) - If the Disk Safe is assigned to the Volume, this column displays the Volume name.
- Recovery Points - Shows the number of Recovery Points in the Disk Safe. Instead of the column heading, the icon is displayed. For the closed Disk Safes, an "Offline" message is displayed. See also: Recovery Points.
- Devices - The number of Devices assigned to the Disk Safe. Instead of the column heading, the icon is displayed. For the closed Disk Safes, an "Offline" message is displayed. See also: Devices.
- On Disk Size - Shows the disk space occupied by the Disk Safe. Instead of the column heading, the icon is displayed. For example, 2.0 MB.
- Auto Add - Indicates whether the "Auto Add Devices" function is turned on.
- Compression - Shows the compression level set for the Disk Safe. Instead of the column heading, the icon is displayed. Possible values: "ZLib Low," "ZLib Medium," "ZLib High," "QuickLZ," or "NONE."
- Encryption - You can assign an AES 256-Bit encryption to the Disk Safe. In that case, you will be asked to create a password. If you choose to encrypt a Disk Safe, the password must be supplied to: browse files, browse Control Panel users, browse databases, and initiate BMR.
- All Devices - Indicates if all Host's Devices are assigned to the Disk Safe. If the "All Devices" option was selected for the Disk Safe, then there is a green icon in this column. Otherwise, the red icon is shown.
- Actions - This column contains icons which provides access to actions over the corresponding Disk Safe.
- Edit - Allows you to access the Disk Safes properties window in order to change properties. See Editing Disk Safes.
- Manage Devices - Allows you to assign new Device(s) or remove the assigned Device(s). See Adding Devices, Removing Devices, Disabling Devices.
- Vacuum - Enables you to reduce the on-disk size. It may also increase the internal fragmentation and make the Disk Safe slower in the future. See Vacuuming Disk Safes.
- Close - Allows you to disable the Disk Safe. You need to close the Disk Safe before removing it. See Closing Disk Safes.
- Detach - Detaching a Disk Safe will delete all configured tasks and historical task information, but the Disk Safe and all backed up data will remain on the disk. See Detaching Disk Safes.
- Delete - Deleting a Disk Safe will remove all Recovery Points and stored data for all Devices associated with the Disk Safe. See Deleting Disk Safes.
List Buttons
The buttons allow working with one or several items selected in the "Disk Safes" list.
- Open Selected - Once one or several closed Disk Safes are checked in the list, this button allows you to open the selected Disk Safes. See Attaching Disk Safes.
- Close Selected - Once one or several open Disk Safes are checked in the list, this button allows you to close the selected Disk Safes. See Closing Disk Safes.
- Remove Selected - Once one or several closed Disk Safes are checked in the list, this button allows you to remove the selected Disk Safes from the system. See Deleting Disk Safes.
- Vacuum Selected - Once one or several closed Disk Safes are checked in the list, this button allows you to reduce the on-disk size.
- Bulk Edit - Allows you to edit the properties of several selected Disk Safes at once. The items can be selected by selecting the appropriate check-boxes. See Editing Disk Safes.
Pages Navigation
The Pages Navigation pane allows you to divide the Disk Safes into pages by specifying the desired number of items per page. The Pages Navigation pane provides buttons to navigate from one page to another.
- Arrows - Turns over pages.
- First - Opens the first page.
- Previous - Opens the previous page.
- Next - Opens the next page.
- Last - Opens the last page.
- Page Number - Field for typing in the page number. Pressto go to the required page. The total number of the existing pages is shown in the pane.
- Items Per Page - Used to define how many items to display per page in the "Disk Safes" list. The system remembers your settings. Unless you change these settings, you will see 10 items per page. If you want to see more or less items per page, you can change the number and press. The maximum number of items per page is 25.
You can also access the "Disk Safes" list associated with the selected Agent using the "Disk Safes" tab of the Agent "Details" Pane. This screen provides the same functionality as the main "Disk Safes" screen including adding a new Disk Safe. See more information in Accessing Agents.
Disk Safe Details Pane
This pane provides detailed information about the Disk Safe selected in the list. Most of the presented data is the same as the data shown in the "Disk Safes" list columns. The following information is available:
| Tip You can collapse/expand the details of a block by clicking on the header of the corresponding block. |
Settings Tab
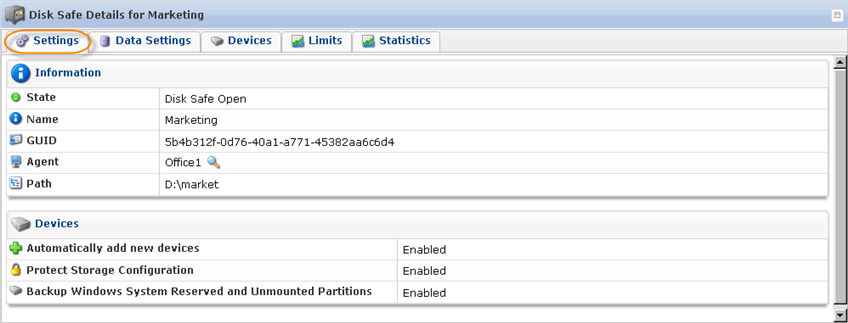
Information
- State - Displays if the Disk Safe is open or closed
- Name - The name of the Disk Safes is shown. The name is defined during Disk Safe creation. It can be edited later. It is used to identify the Disk Safe in the list.
- GUID - Globally Unique Identifier generated by the system.
- Agent (Enterprise Edition) - The name of the Agent is shown.
- Volume (Advanced, Enterprise Edition) - The Volume that includes the Disk Safe.
- Path - Path where the Disk Safe is physically located. For example, C:\Disk_Safe.
Devices
- Automatically add new devices - This option will automatically add all available devices to the Disk Safe. Uncheck the checkbox to select the devices you want to add to the Disk Safe.
- Protect Storage Configuration (Enterprise Edition, Advanced Edition) - This option allows to back up partition tables.
- Backup Windows System Reserved and Unmounted Partitions (Advanced Edition) - This option allows to back up hidden Windows system partition.
Data Settings Tab
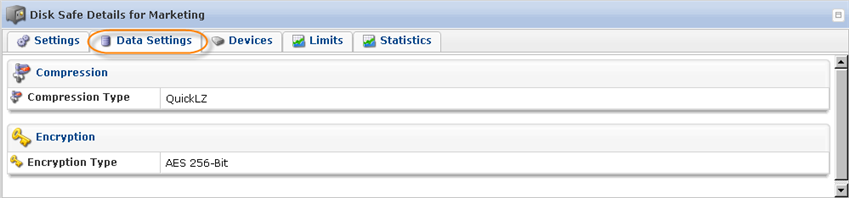
Compression
- Compression Type - The compression level set for the Disk Safe. Possible values: "ZLib Low," "ZLib Medium," "ZLib High," "QuickLZ" and "NONE."
Encryption
- Encryption Type - You can assign an AES 256-Bit encryption to the Disk Safe. In that case, you will be asked to create a password. If you choose to encrypt a Disk Safe, the password must be supplied to: browse files, browse Control Panel users, browse databases and initiate BMR.
Devices Tab
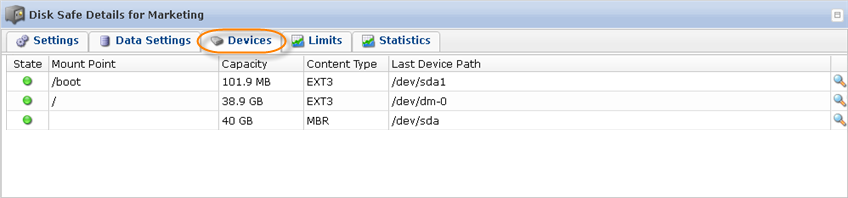
Assigned Devices and information about them. Read more in Devices.
Limits Tab
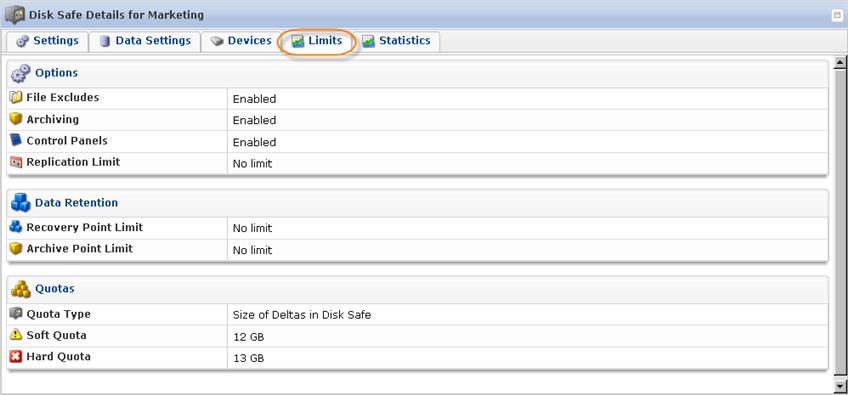
Options
- File Excludes - Indicates whether File Excludes and Advanced Excludes are allowed on the Disk Safe.
- Archiving - Indicates whether the Archiving is allowed on the Disk Safe.
- Control Panels - Indicates whether Control Panels are enabled or disabled on the Disk Safe.
- Replication Limit - Shows the Replication Limit.
Data Retention
- Recovery Point Limit - The maximum number of Recovery Points stored in the Disk Safe.
- Archive Point Limit - The maximum number of Archive Points stored in the Disk Safe.
Quotas
- Quota Type - The type of quota assigned to the Disk Safe. Quotas are set to limit the disk usage of the Disk Safe. The limit is set on the basis of space occupied by Disk Safes or size of deltas.
- Soft Quota - The value in bytes or in deltas. Soft Quota is a warning level that informs users that they are close to reaching their effective limit.
- Hard Quota - The value in bytes or in deltas. Hard Quota allows resources to be occupied by data. If the Hard Quota is reached, then the system forbids generation of new Recovery Points. The replication is interrupted and failed.
Statistics Tab
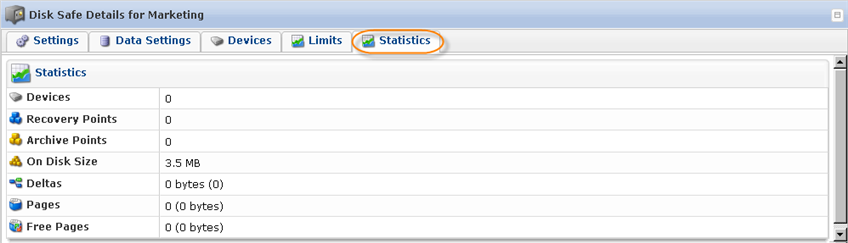
- Devices - The number of assigned Devices.
- Recovery Points - The number of Recovery Points in the Disk Safe.
- Archive Points - The number of Archive Points in the Disk Safe.
- On Disk Size - The disk space occupied by the Disk Safe.
- Deltas - Deltas are the data that has changed since the last backup run.
- Pages -
- Free Pages -