The following actions are available to customize the view of the "Disk Safes" list:
- Hide/Show column
- Manage the number of items per page
- Sort the items in the list
- Filter the list

Tip
You can use these functions to search ("bubble up") for the necessary items in the list.
Hiding/Showing Columns
The columns can be hidden.
To hide a column, follow the instructions below.
1. Hover the mouse pointer over the right side of the last column header. An arrow button displays.

2. Click on the arrow in the column header.

3. Uncheck the appropriate column name(s) in the drop-down menu.
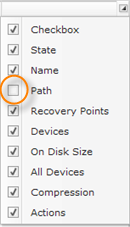
4. The column will disappear from the list.
To display a hidden column, follow the instructions below.
1. Hover the mouse pointer over the right side of the last column header. An arrow button displays.
2. Click on the arrow in the column header
3. Check the appropriate column name(s) in the drop-down menu.
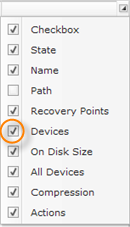
4. The column will appear in the list.
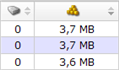
Sorting the List
You can sort the "Disk Safes" list on the basis of column content in ascending or descending order. You might want to put a list of Disk Safe descriptions in alphabetical order or compile a list of Disk Safes by their size from largest to smallest. Sorting data helps you quickly visualize and understand your replication data better, organize and find the Disk Safes that you want, and ultimately make more effective decisions.
You can sort text data (A to Z or Z to A) and numbers (smallest to largest or largest to smallest).
The sort criteria are saved in the system, so that sorting is reapplied each time you access the "Disk Safes" list.
To sort the list in ascending/descending order, follow the instructions below.
1. Move the mouse pointer over the column header.
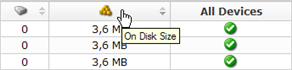
2. Click on the column header and it will sort in either ascending or descending order.
 |
 |
Managing Items Per Page
To define number of items per page in the "Disk Safes" list, type the value in the "Items Per Page" field and press <Enter>. The system remembers your settings. Unless you change this preference, you will see 10 items per page. The maximum number of items per page is 25.

To go to a specific page, type in the page number and press <Enter>.

To turn over the pages, you can use the "Arrow" buttons.

The total number of existing pages is shown after the slash.

Filtering the List
You can reduce the number of visible records in the "Disk Safes" list using Basic and Advanced List Filters.
Filtered data displays only the records that meet the criteria you specify and hides records that you do not want displayed. Criteria are filter options you use to limit which records are included in the results view. You can use one or more filter options at once.
Basic List Filter
The Basic List Filter allows you to reduce the number of Disk Safes in the list using the most commonly used filter options.
Follow the instructions below to apply the Basic Filter.
1. Click on "Basic List Filter" located in the Disk Safes sub-menu.
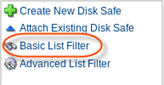
2. The "Basic List Filter" window will open.
| Standard Edition, Advanced Edition | Enterprise Edition |
|---|---|
 |
 |
3. Define one or several filter options:
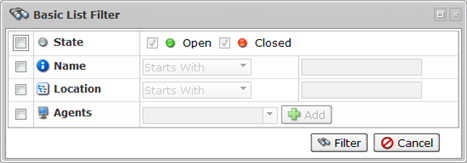
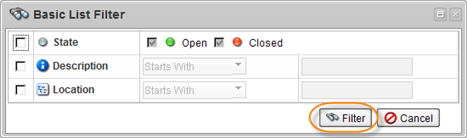
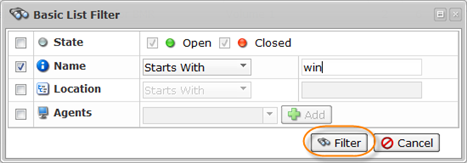
- State - Select this checkbox to have the ability to define the filters on the basis of the Disk Safe State. The following options are available if "State" is checked:
- Open - To search only for open Disk Safes.
- Closed - To search only for closed Disk Safes.
Tip
By default, the "Open" and "Closed" checkboxes are checked and all Disk Safes are displayed.
- Description - Select this checkbox to filter the list by the Disk Safe Description. The following items are available in the drop-down list:
- Starts with - To filter by Description that begins with a specific character(s). Type in the beginning characters of the Description.
- Contains - To filter by Description that has specific character(s) anywhere in the text. Type in characters that can be contained in the Description.
- Ends with - To filter by Description that ends with a specific character(s). Type in the ending characters of the Description.
Note
For example, there is a Description of a Disk Safe - "Marketing backup John." And you remember that there is "John" at the end of the Disk Safe description. You can set the Description Ends with "John" to search for the Disk Safe. All Disk Safes ending with the "John" string will be displayed in the list.
- Name (Enterprise Edition) - Select this checkbox to filter the list by the Disk Safe Name. The following items are available in the drop-down list:
- Starts with - To filter by Name that begins with a specific character(s). Type in the beginning characters of the Name.
- Contains - To filter by Name that has specific character(s) anywhere in the text. Type in characters that can be contained in the Name.
- Ends with - To filter by Name that ends with a specific character(s). Type in the ending characters of the Name.
- Location - Select these checkboxes to filter your list by the path where the Disk Safe is located. The following items are available in the drop-down list:
- Starts with - To filter by Location that begins with a specific character(s). Type in the beginning characters of the Location.
- Contains - To filter by Location that has specific character(s) anywhere in the text. Type in characters that can be contained in the Location.
- Ends with - To filter by Location that ends with a specific character(s). Type in the ending characters of the Location.
Note
For example, there is a Location of a Disk Safe - "D:\backups\marketing\" - and you remember that the Disk Safe is in the folder "marketing." So, you can set the Location Contains "marketing" to search for the Disk Safe.
- Agent (Enterprise Edition) - Select this checkbox to filter the list by the Disk Safe Name. Choose the Agent in the drop-down menu and click "Add" button.
4. Click on "Filter" to apply the filter to the "Disk Safes" list.
| Standard Edition, Advanced Edition | Enterprise Edition |
|---|---|
 |
 |
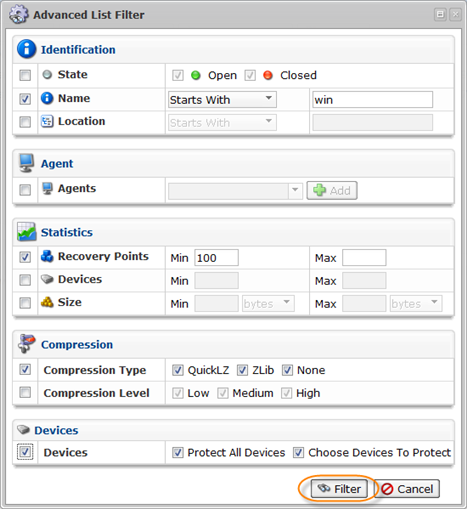
Advanced List Filter
The Advanced List Filter allows you to reduce the number of Disk Safes in the list on the basis of all possible filter options.
Follow the instructions below to apply the Advanced Filter to the "Disk Safes" list.
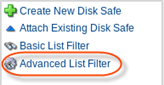
1. Click on "Advanced List Filter" located in the Disk Safe sub-menu.
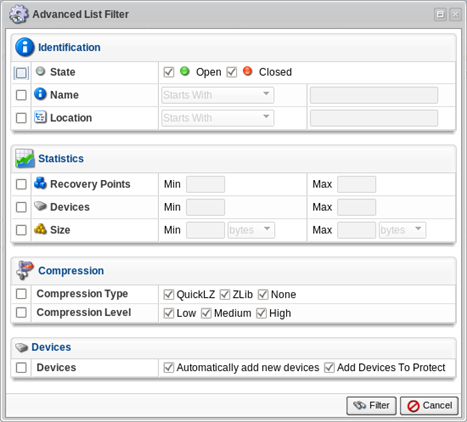
2. The "Advanced List Filter" window will open.
| Standard Edition, Advanced Edition | Enterprise Edition |
|---|---|
 |
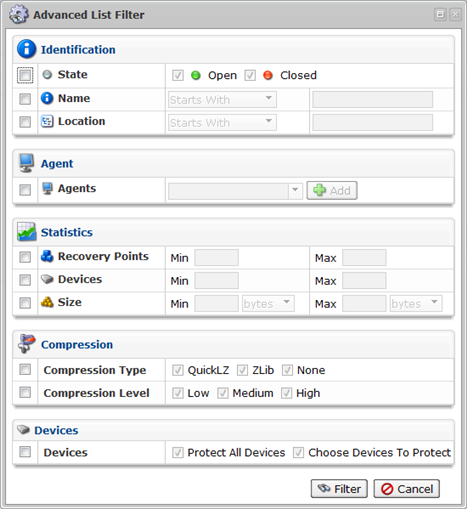 |
This window has several blocks with filter options.
| Tip You can hide/open the filter options for every block by clicking on the header of the corresponding block. |
3. Set one or several filter options to search the required Disk Safes.
Identification
This block contains the same filter options as the Basic List Filter. See Basic List Filter above.
Statistics
Provides the following filter options:
- Recovery Points - Select this checkbox to filter the list on the basis of the number of the Recovery Points.
- Min - Recovery Points more than or equal to this number.
- Max - Recovery Points less than or equal to this number.
- Devices - Select this checkbox to filter the list on the basis of the number of the Devices for the Disk Safe.
- Min - Device quantity more than or equal to this number.
- Max - Devices quantity less than or equal to this number.
- Size - Select this check-box to filter the list on the basis of the number of the Devices for the Disk Safe.
- Min - Disk Safe size more than or equal to this number. You can enter a number in Bytes, KB, MB, GB, TB or PB using the corresponding drop-down menu.
- Max - Disk Safe size less than or equal to this number. You can enter a number in Bytes, KB, MB, GB, TB or PB using the corresponding drop-down menu.
Compression
Provides the following filter options:
- Compression Type - Select this checkbox to filter the list on the basis of the Compression Type.
- QuickLZ - To search for the Disk Safes where Compression Type is "QuickLZ."
- Zlib - To search for the Disk Safes where Compression Type is "Zlib."
- None - To search for the Disk Safes where Compression is not used.
Tip
By default, the "None" and "Zlib" checkboxes are checked and all Disk Safes are displayed.
- Compression Level - Select this checkbox to filter the list on the basis of the Compression Level.
- Low - To search for the Disk Safes where Compression Level is "Low."
- Medium - To search for the Disk Safes where Compression Level is "Medium."
- High - To search for the Disk Safes where Compression Level is "High."
Tip
By default, the "Low," "Medium" and "High" checkboxes are checked and all Disk Safes are displayed.
Devices
Provides the following filter options:
- Devices - Select this checkbox if you know the Disk Safe is used to back up all Devices or the defined chosen devices.
- Automatically add new devices - To search for the Disk Safe which is used to back up all Devices.
- Add Devices To Protect - To search for the Disk Safe which is used to back up the defined devices.
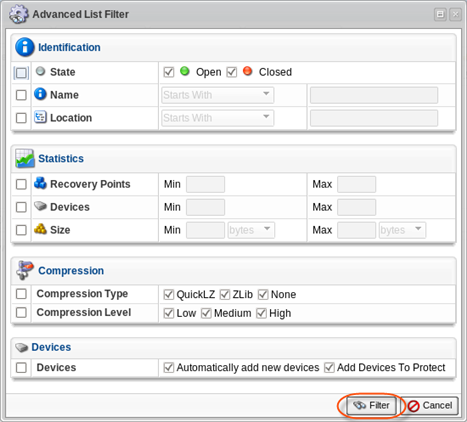
4. Click on "Filter" to apply the filter to the "Disk Safes" list.
| Standard Edition, Advanced Edition | Enterprise Edition |
|---|---|
 |
 |
| Tip Click the "Show all" link to see the whole list of Disk Safes.  |