The CDP server comes with SSL already set up. By default, SSL works with a self-signed certificate. This certificate can be used for encryption only and does not prove the identity of the server.
That default certificate is not signed by any well-known Certification Authority (CA), so when the users try to open the SSL version of the CDP Server Web Interface, they usually see the warning in the browser window (see the image below).
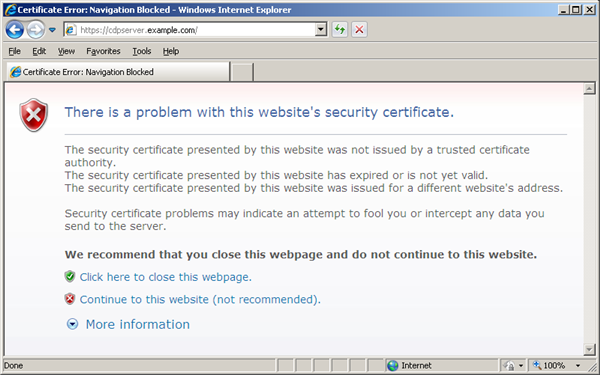
If you decide to continue working with this self-signed certificate, you have to perform several steps to "accept" the certificate before you access the site. This usually occurs only the first time you access the site. Then the self-signed certificate is stored in the browser database marked as trusted. This scenario is suitable for testing purposes or for running the CDP Server on the company's internal networks.
But if you want to provide a CDP SSL interface to the outside world, you should obtain a certificate signed by a well-known CA. The role of a CA is to verify that the CDP Server you are trying to access actually has the name you are trying to access it by, and that this server actually belongs to your organization.
Obtaining CA-Signed Certificate for Production Use
Certificates for production use are issued by trusted 3rd party Certification Authorities (CAs). Many CAs simply verify the domain name and issue the certificate, whereas others (VeriSign, etc.) verify the existence of your business, the ownership of your domain name, and your authority to apply for the certificate, providing a higher standard of authentication.
Every browser comes with a pre-defined list of well-known CAs. A sample list of CAs can be found here.
Along with the name of your organization and the name of your server, a CA-signed certificate contains the public key of the server. This public key is used by the browser to encrypt data sent to the server. There is a private key on the server. The server uses the private key to decrypt the data encrypted by the public key. The private key should be kept secure on the server to prevent unauthorized access. Both private and public keys participate in the process of generating the certificate.
To learn more about public key cryptography, you can read this wikipedia page. To learn more about certificates and steps to buy a certificate, you need to take a look at CAs' websites. Some of the most well known CAs are:
Generating Certificate Request
Before the CA can issue you the certificate, you should generate the certificate request and send it to the CA for signing. The steps for generating a certificate request are provided below.
In the examples below, all operations are performed by the Java keytool - a key and certificate management utility. This utility does not come with the CDP Server. To get this utility, you should download and install Java Development Kit (JDK) or Java Runtime Environment (JRE). Both of these packages can be downloaded from the java.sun.com website.
Importing Certificate into the Trust-Store
The following steps show you how to install a SSL certificate purchased from a Certification Authority. Your SSL vendor may have different instructions, please check with them for proper certificate installation. The following examples refer to GoDaddy and VeriSign.
To enable a certificate, you need to use the Java keytool - a key and certificate management utility. The keytool stores the keys and certificates in a so-called keystore.
| Note In CDP 2.0, you could paste the SSL and private key into the HTTPS configuration page in the web interface. But this way had some limitations: only root CA signed certificates worked. In CDP, the new method allows chained and wildcard certificates to be installed as well. Using the keytool is very standard for applications with a web interface using Java. |
Windows
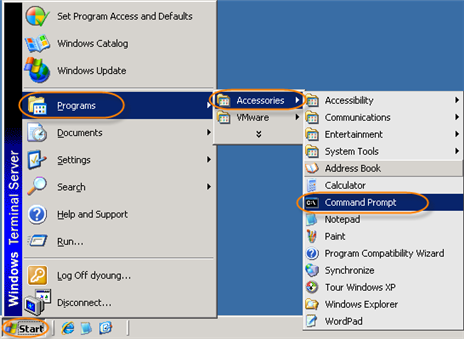
1. Start a Windows Command Prompt.
Go to Start ![]() Programs
Programs ![]() Accessories
Accessories ![]() Command Prompt.
Command Prompt.
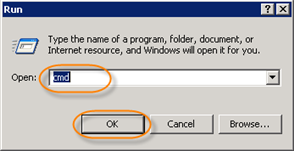
Alternatively, you can go to Start ![]() Run
Run ![]() type "cmd" without quotes and press <Enter>.
type "cmd" without quotes and press <Enter>.
2. Use -import option of Java keytool to place a certificate to keystore.
You have the website certificate in a local .cer file. Now you can use Java keytool to import it into keystore. Use the -import command:
Substitute the paths and option values with the correct ones for your specific system. For example, type the following command to create a keystore named "keystore" and import the certificate into an entry with an alias of "jetty."
Then you will be requested to enter a keystore password. It must be at least 6 characters.

Since the keystore does not exist yet, keytool will create it. This sample command imports the certificate(s) in the file file.cer and stores it in the keystore entry identified by the alias jetty.
When you are adding a trusted certificate entry, the alias should not already exist in the keystore. If the alias does already exist, then keytool outputs an error, since there is already a trusted certificate for that alias, and does not import the certificate. If the alias does not exist in the keystore, keytool creates a trusted certificate entry with the specified alias and associates it with the imported certificate.
| Tip You can display the contents of the keystore using the following command:
keytool -list -v -keystore |
3. Restart the CDP Server service.
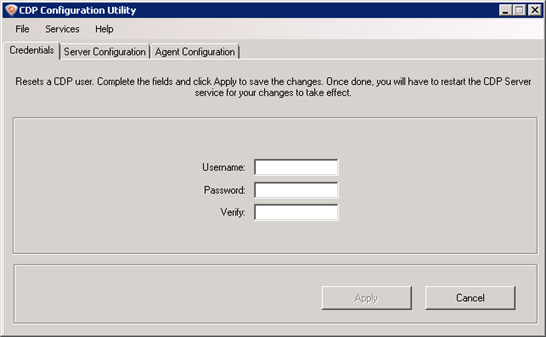
Follow the instructions below to restart the CDP Server using the CDP Configuration Utility.
Go to Start ![]() All Programs
All Programs ![]() R1Soft CDP Backup
R1Soft CDP Backup ![]() CDP Configuration Utility.
CDP Configuration Utility.
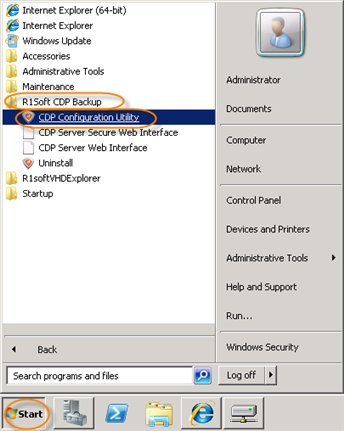
The Configuration Utility will start.
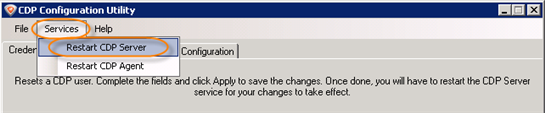
From the "Services" menu, select the "Restart CDP Server" option.
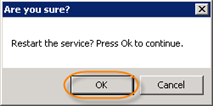
Confirm your request to restart the CDP Server by clicking "OK."
Linux
1. Establish a SSH connection to the Linux server where the CDP Server is installed. Or log in on the text Linux console.
You should either log in as root or obtain root permissions after login via su or sudo command.
| Note Your home directory should be set to /root. |
2. Upload the key and the certificate to the CDP Server.
3. Use the cd command to go to the directory where the keys are in.
4. Run the following commands to convert the key and the certificate files from PEM into DER format.
5. Use the cd command to go to the directory where keytool is located.
And define the access rights to the following applications. keytool that comes with our product is not executable, so you have to chmod 755 it.
6. Use the wget command to download the ImportKey utility:
7. Unzip ImportKey.zip.
8. Run the following command. It will launch the ImportKey utility and create the keystore file (default name is keystore.ImportKey) in your home directory (root). The private key and the certificate will be placed there.
| Note The keystore's password and the key's passwords must be set to password. |
9. The following command will allow you to set the password for your keystore file. The default password is importkey. Enter it when prompted and then type the new password, which must be set to "password".
10. This command will allow you to set the password for the key file in the keystore. The default password is importkey. Enter it when prompted and then type the new password, which must be set to "password".
11. Rename the keystore.ImportKey file (default name) into keystore.
12. Run the following command to download the trusted certificate from the Certification Authority (CA). In our example, we connect to Go Daddy.
13. Import the received trusted certificate into your keystore file.
14. You may have another keystore in your R1Soft folder. To make a backup copy of it, you should rename it (for example, to "keystore.old" as shown in the following example).
15. Copy the new keystore file to your R1Soft folder.
16. Restart the CDP Server.
keytool Options
- - alias - All keystore entries are accessed via unique aliases. Aliases are case-insensitive. An alias is specified when you add an entity to the keystore using the -import command. Subsequent keytool commands must use this same alias to refer to the entity.
- - file - Define absolute or relative path to your certificate file. If you define only file name, it means, that the file is located in the root directory.
- - keystore - Each keytool command has a -keystore option for specifying the name and location of the persistent keystore file for the keystore managed by keytool. A keystore is created when you use -import command to add data to a keystore that does not already exist. If you do not specify a -keystore option, the default keystore is a file named .keystore in your home directory (as determined by the "user.home" system property). If that file does not already exist, it will be created.
Read more about Java keytool for Windows:
http://java.sun.com/javase/6/docs/technotes/tools/windows/keytool.html
Read more about Java keytool for Linux:
http://download.oracle.com/javase/6/docs/technotes/tools/solaris/keytool.html.