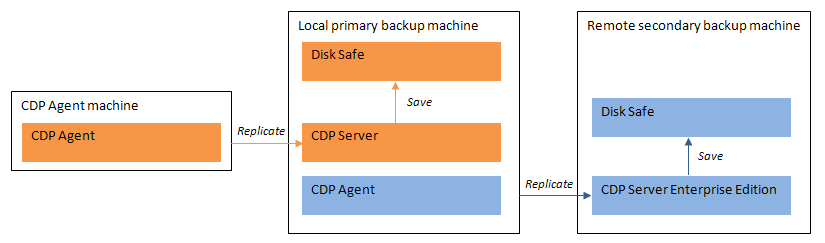
This topic provides instructions on how to set up Multi-Point Replication based on the following scheme.
Follow the instructions below.
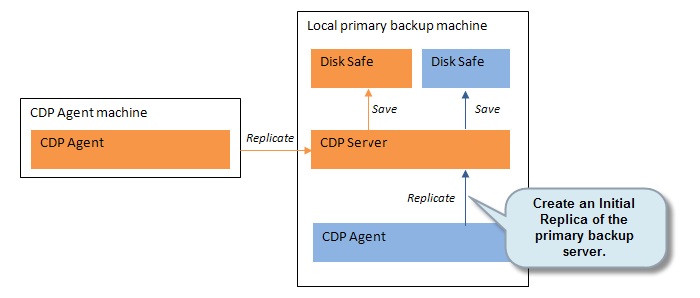
Step 1 - Create an Initial Replica of the backup server locally
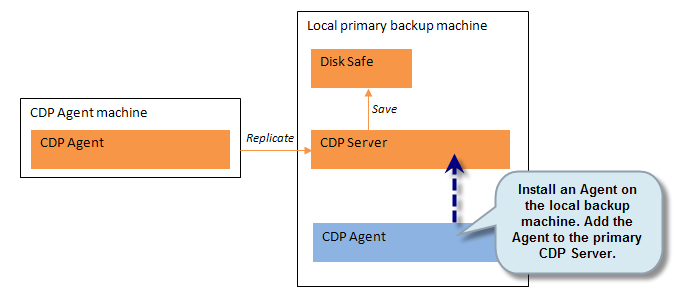
1. Install a new Agent on the local primary backup server. Add the Agent to the CDP server. Activate the Agent. See Installing Agent on Linux, Installing Agent on Windows, Adding the Agent to the CDP Server, Adding the Server Key to Linux Agent, Adding the Server Key to Windows Agent.
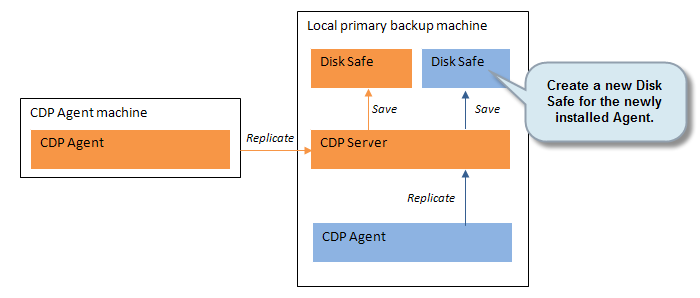
2. Create a new Disk Safe for the newly added Agent.
3. In the new Disk Safe, create a seed (Initial Replication) of the backup server.
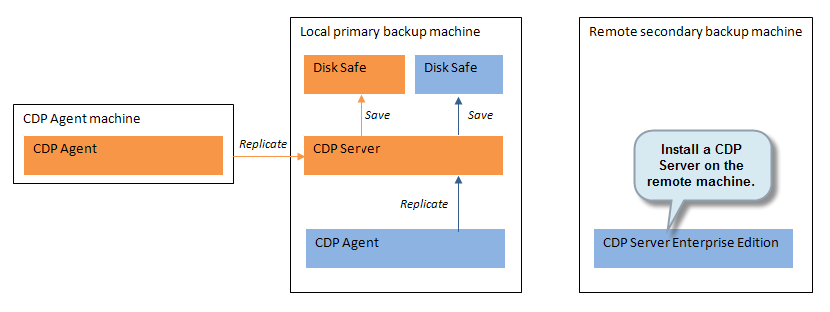
Step 2 - Install a remote CDP Server
Install a second CDP Server Enterprise edition on the remote machine. For instructions, see Installing Enterprise Edition on Linux, Installing Enterprise Edition on Windows.
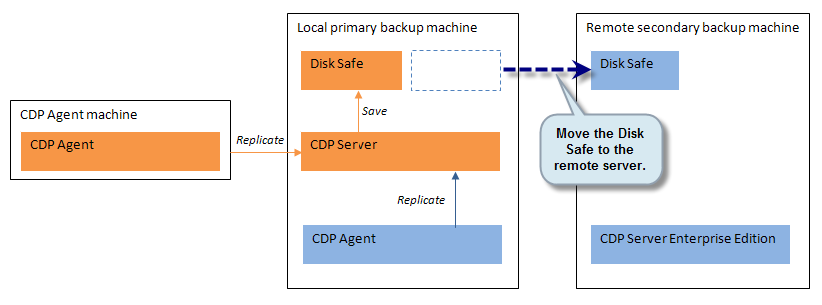
Step 3 - Copy/move the Disk Safe
Move the Disk Safe to the remote machine where the CDP Server is installed. For detailed instructions, see Copying and Moving Disk Safes.
| Notice Always close your Disk Safe in the CDP Web Interface before making a copy. It is not safe to copy the Disk Safe if it is open. |
| Notice If you move or copy a Disk Safe folder, always move or copy its complete contents. Never attempt to copy individual files from one Disk Safe to another. Doing so may damage your Disk Safe. |
Step 4 - Add the Agent to the second (remote) CDP Server
Add the Agent installed on the local machine to the second CDP Server installed on the remote machine. Update the key for the Agent. See Adding the Agent to the CDP Server, Adding the Server Key to Linux Agent, Adding the Server Key to Windows Agent.
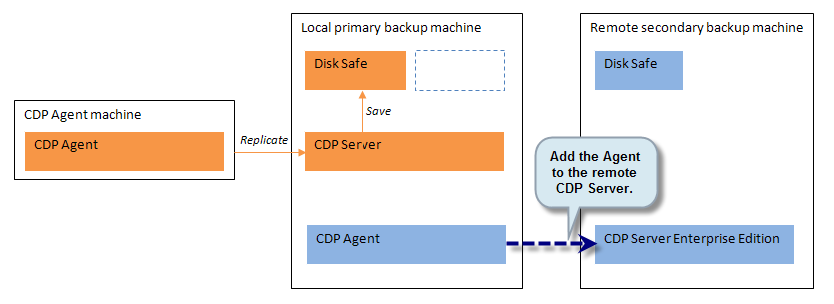
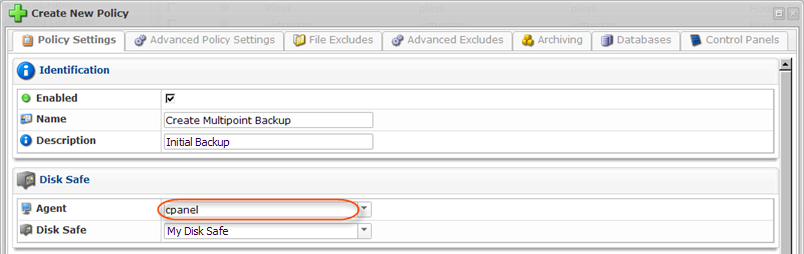
In the below example, we added the installed Agent to the second CDP Server. The Agent name is "cpanel." Once the Agent is added to the second CDP Server, it is listed on the "Agents" screen.

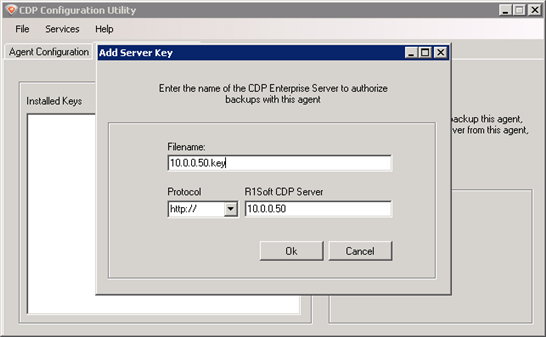
As shown in the below image, we added the Server Key to the Agent using the Windows CDP Agent Configuration Utility. To do this, select the "Authorized CDP Servers" tab. ![]() Click the "Add..." button.
Click the "Add..." button. ![]() Enter the Filename, Protocol, and R1Soft CDP Server IP.
Enter the Filename, Protocol, and R1Soft CDP Server IP. ![]() Click "Ok."
Click "Ok."
Once the key is added, it appears on the "Authorized CDP Servers" tab, as displayed in the below example.

Step 5 - Create working environment
On the remote CDP server, set up the Users, User Groups, and Volumes in the second (remote) CDP Server. See Adding Users, Adding Groups, Creating Volumes.
Step 6 - Re-attach the Disk Safe
On the remote CDP Server, re-attach the Disk Safe. While re-attaching, select the Agent installed on the first local machine. See Attaching Disk Safes.
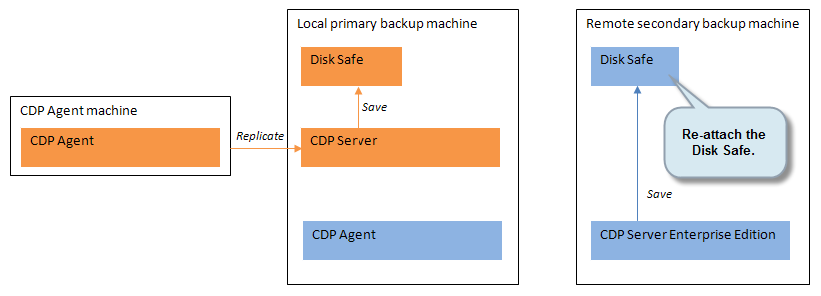
In our example, we selected the "cpanel" Agent when attaching the Disk Safe.

The attached Disk Safe is displayed in the "Disk Safes" list among the other Disk Safes.
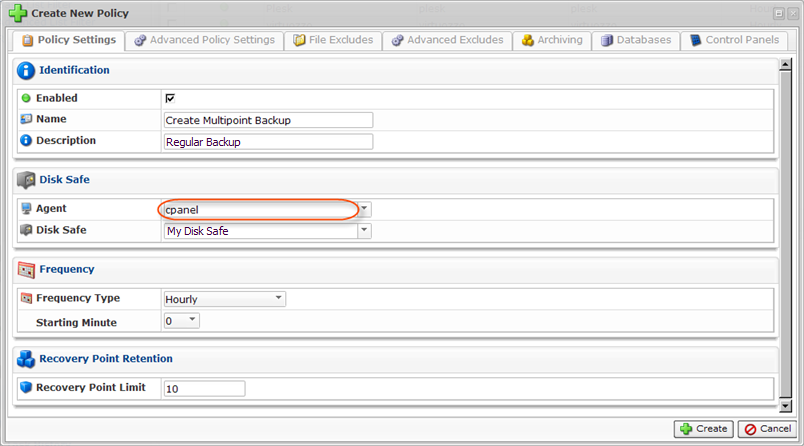
Step 7 - Configure the replication schedule
Configure the replication schedule on the secondary (remote) CDP to protect the local machine. See Creating Policies.
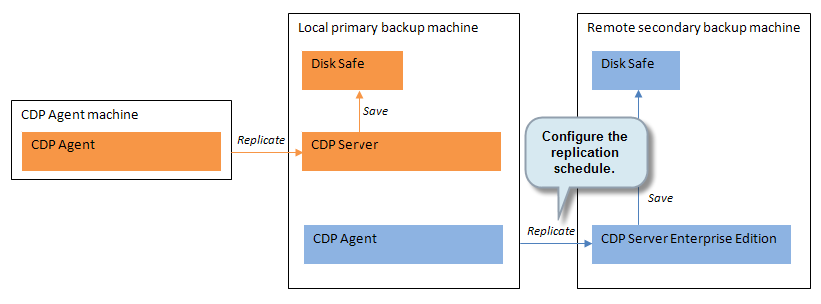
In the following image, you can see that we selected the Agent called "cpanel" when creating the New Policy on the second CDP Enterprise Server.