Steps to review and perform before installing DCC on Linux: DCC installation prerequisites.
Unlike Server Backup Manager products that are installed in one step, Data Center Console (DCC) requires some configuration prior to installation as well as some additional manual steps after the initial install of the software package.
Use the following instructions to install and configure Data Center Console on Linux.
Installing Data Center Console on Linux
There are two ways of installing Data Center Console on Linux - automatic from repository and manual. Before installing Data Center Console, make sure your machine matches the following recommended system requirements:
- Operating System: 64-bit only, Linux 2.6
- Physical Memory: 4 GB
- Free Disk Space: Not less than 10 GB

Notice
You should install Data Center Console on an independent host that does not have a backup manager installed.
Automatic installation on CentOS
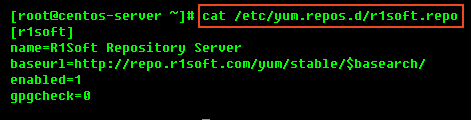
1. Open the new file /etc/yum.repos.d/r1soft.repo in your favorite Linux text editor: vim, emacs, pico, or mcedit.

2. Insert the following text into the file:
| Tip If you do not know how to work with text editors in a Linux SSH session, run the following command: cat > /etc/yum.repos.d/r1soft.repo Paste the string from the clipboard and press Ctrl-D.
|
As a result, the content of the file /etc/yum.repos.d/r1soft.repo will look like the following:
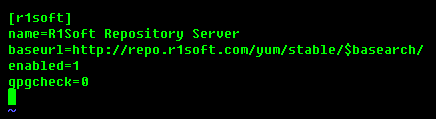
3. Save the file and exit.
4. Execute the following command to install Data Center Console.
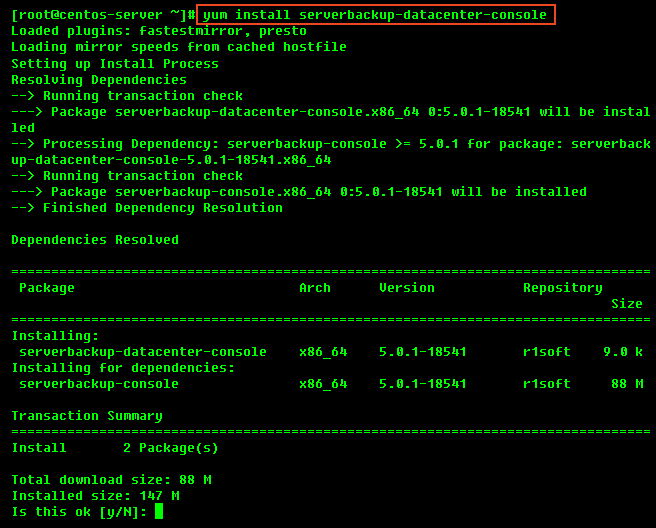
5. Type y to confirm the download.

Automatic installation on Debian or Ubuntu
1. Configure APT repository, and then download and install the R1Soft apt gpg key by executing the following commands:
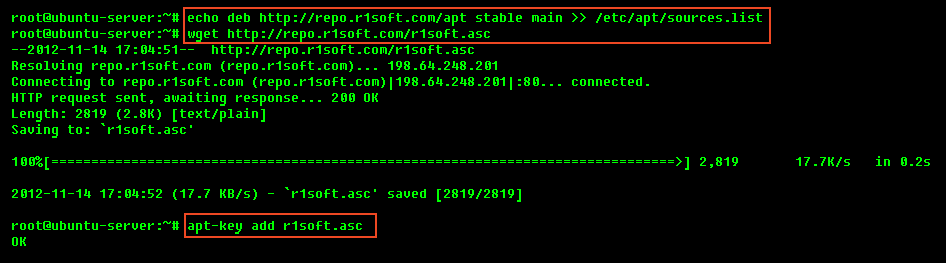
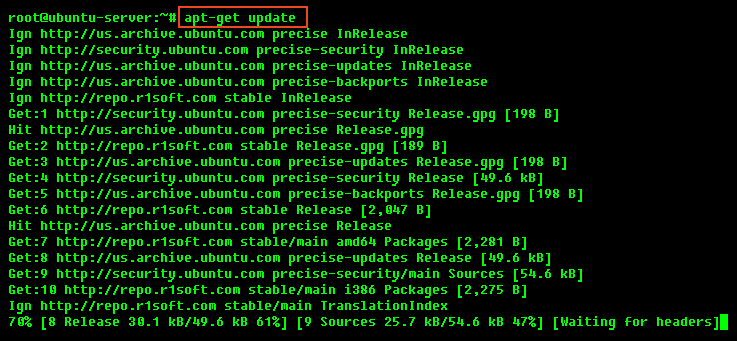
2. Download repository metadata into the local cache for faster search by executing the following command:
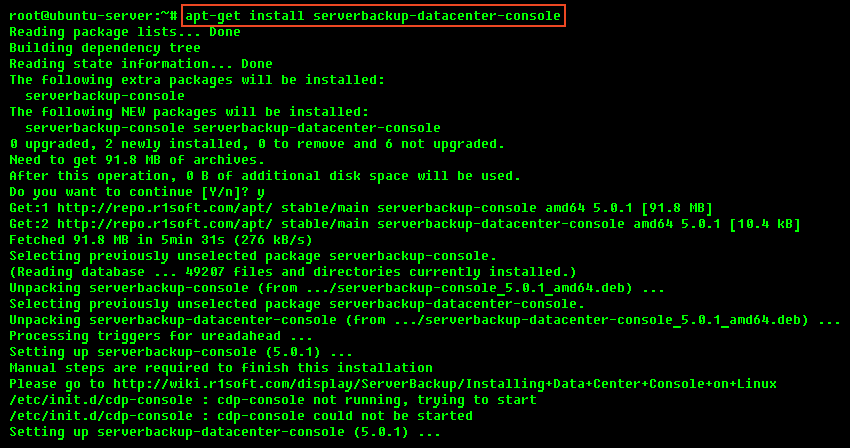
3. Install Data Center Console by executing the following command:
Manual installation on CentOS
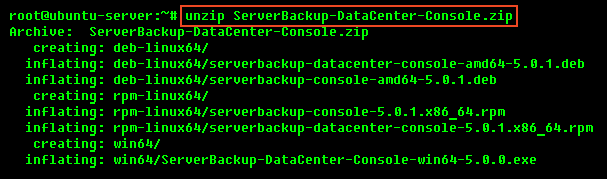
1. Extract the downloaded archive with the following command:
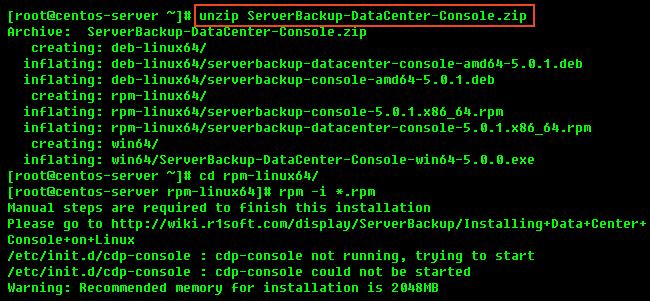
The extracted archive contains two folders: one with .deb packages (in our case, "deb-linux64") and one with RPM packages ("rpm-linux64").
2. On CentOS, change the working directory to the one containing RPM packages:
3. After changing the working directory, install Data Center Console by executing the command:

Manual installation on Debian or Ubuntu
1. Extract the downloaded archive with the following command:
The extracted archive contains two folders: one with .deb packages (in our case, "deb-linux64") and one with RPM packages ("rpm-linux64").
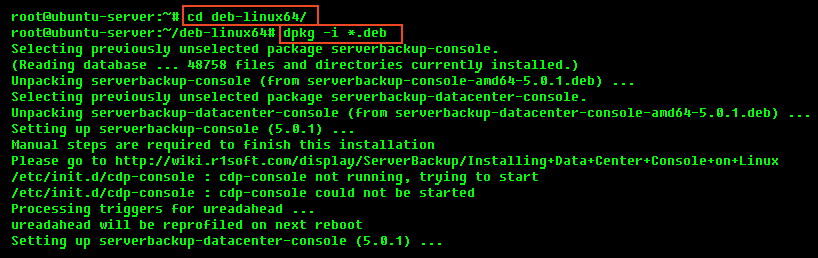
2. On Debian or Ubuntu, change working directory to the one containing .deb packages:
3. After changing the working directory, install Data Center Console by executing the following command:
4. Perform the following steps before launching Data Center Console.
Installing MySQL Java connector
Next, you need to add a JBDC connector.
1. Download the MySQL Connector file using the following wget command:

| Notice When you install Data Center Console, newer versions than used in these examples may be available. Using the latest version is recommended. |
2. Unpack the downloaded archive:

3. Copy the jar file to the configuration folder:
Configuring database properties
1. Open the /usr/sbin/r1soft-datacenter-console/conf/server.properties file in your favorite Linux text editor: vim, emacs, pico, or mcedit.
2. Replace the database name, <username>, and <password> fields with the relevant values for your system.
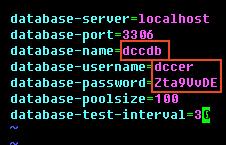
3. Save the file and exit.
Starting the Data Center Console
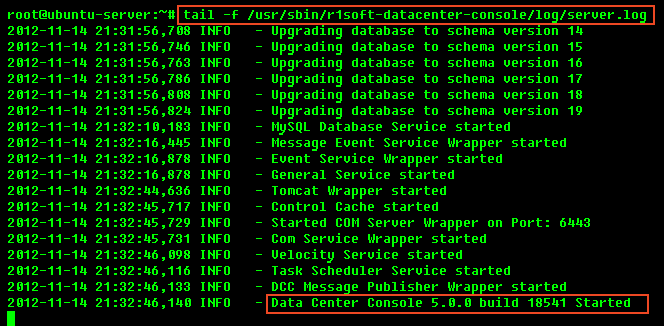
1. Run the following command to start Data Center Console:

2. Check the log file to verify that Data Center Console has started successfully:
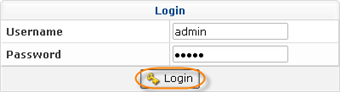
Accessing Data Center Console for the first time
1. Open a Web browser and enter the following URL:
2. In the login form, enter the default username ("admin") and password ("admin"), and then click Login.